(Adjusted column widths in Diplomacy Buildings table) |
(Explained typical number of expansions to complete all quests.) Tags: Visual edit regular_user |
||
| (20 intermediate revisions by 8 users not shown) | |||
| Line 1: | Line 1: | ||
| − | The '''{{PAGENAME}}''' is the first of the [[Cultural settlements]]. The purpose is to lead the [[Vikings]] to prosperity as the Thane of their new village. |
+ | The '''{{PAGENAME}}''' is the first of the [[Cultural settlements]], released on January 3rd 2019. The purpose is to lead the [[Vikings]] to prosperity as the Thane of their new village. |
| − | This page explains the workings of the settlement and |
+ | This page explains the workings of the settlement and its buildings. For information about the quests, embassy advancements, and rewards check the [[Vikings]] page. |
== Start == |
== Start == |
||
| Line 10: | Line 10: | ||
With each start of a new Cultural settlement, the impediments will be arranged differently in the city. Abandoning a settlement will '''not''' rearrange the impediments. |
With each start of a new Cultural settlement, the impediments will be arranged differently in the city. Abandoning a settlement will '''not''' rearrange the impediments. |
||
| − | Additional expansions can be unlocked by either paying [[#Cultural Goods Buildings|cultural goods]] or [[diamonds]]. The player can unlock a total of [[#Expansions|16 expansions]] by paying cultural goods and 4 with diamonds. The total city grid can fit 25 expansions, including the first 4. |
+ | Additional expansions can be unlocked by either paying [[#Cultural Goods Buildings|cultural goods]] or [[diamonds]]. The player can unlock a total of [[#Expansions|16 expansions]] by paying cultural goods and 4 with diamonds. The total city grid can fit 25 expansions, including the first 4. You should only need [[#Expansions|8 or 9 expansions]] to complete all quests, which you can get by paying cultural goods; you do not need to spend diamonds. |
== Embassy == |
== Embassy == |
||
[[File:Viking Embassy.png|left|150px|The Viking Embassy]] The Viking embassy has a size of {{ISIZ}} 4x3 and can be moved to another location on the grid. The embassy cannot be sold. |
[[File:Viking Embassy.png|left|150px|The Viking Embassy]] The Viking embassy has a size of {{ISIZ}} 4x3 and can be moved to another location on the grid. The embassy cannot be sold. |
||
| + | The Embassy produces {{Copper Coins}} 100 Copper coins per day. |
||
| ⚫ | Click on the embassy (or on the 'Develop' button) to open the '''Embassy Advancements window'''. This window shows the player's [[#Cultural Goods Buildings|cultural goods]] stock at the top left. The main screen shows the [[Vikings#Embassy Advancements|embassy advancements]] and the costs to unlock them: the amount of cultural goods shown in the middle and on the bottom the amount of [[#Diplomacy Buildings|diplomacy]] needed. The amount of [[diamonds]] displayed to unlock an advancement depends on the amount of goods and/or diplomacy still needed. The player can choose to gain the amount of resources and diplomacy still needed, or pay the difference with diamonds.<br /><br /> |
||
| + | |||
| ⚫ | Click on the embassy (or on the 'Develop' button, hotkey 'R') to open the '''Embassy Advancements window'''. This window shows the player's [[#Cultural Goods Buildings|cultural goods]] stock at the top left. The main screen shows the [[Vikings#Embassy Advancements|embassy advancements]] and the costs to unlock them: the amount of cultural goods shown in the middle and on the bottom the amount of [[#Diplomacy Buildings|diplomacy]] needed. The amount of [[diamonds]] displayed to unlock an advancement depends on the amount of goods and/or diplomacy still needed. The player can choose to gain the amount of resources and diplomacy still needed, or pay the difference with diamonds.<br /><br /> |
||
[[File:Viking Embassy Screen.png|center|500px|Embassy Advancements window]]<br /> |
[[File:Viking Embassy Screen.png|center|500px|Embassy Advancements window]]<br /> |
||
| Line 22: | Line 24: | ||
== Buildings == |
== Buildings == |
||
| + | |||
=== Building Menu === |
=== Building Menu === |
||
The building menu consists of four types of buildings and an expansions window: |
The building menu consists of four types of buildings and an expansions window: |
||
| Line 41: | Line 44: | ||
'''Beware''': when finishing or abandoning a settlement, all population and copper coins in stock will be lost. |
'''Beware''': when finishing or abandoning a settlement, all population and copper coins in stock will be lost. |
||
| − | {| class=" |
+ | {| class="FoETable" |
| − | ! style="width: |
+ | ! style="width:150px" |Building |
| − | ! colspan="2" style="width:150px; |
+ | ! colspan="2" style="width:150px; "|Construction |
| − | ! style="width:150px; |
+ | ! style="width:150px; "|{{VPOP}} Population |
| − | ! style="width:150px; |
+ | ! style="width:150px; "|{{Copper Coins}} Production |
|- |
|- |
||
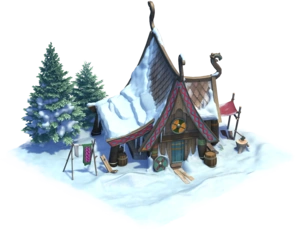
|[[File:Clan House.png|120px|Clan House]]<br />'''Clan House''' |
|[[File:Clan House.png|120px|Clan House]]<br />'''Clan House''' |
||
| − | |{{ICOI}}<ref name="Age">Amount depends on the player's current [[era]].</ref><br />{{ISUP}}<ref name="Age" /><br />{{XX}} |
+ | | style="width:75px;" |{{ICOI}}<ref name="Age">Amount depends on the player's current [[era]].</ref><br />{{ISUP}}<ref name="Age" /><br />{{XX}} |
| − | |{{ISIZ}} 3x5<br />{{IROA}} Yes<br />{{ITIM}} |
+ | | style="width:75px;" |{{ISIZ}} 3x5<br />{{IROA}} Yes<br />{{ITIM}}4h |
|{{VPOP}} 172 |
|{{VPOP}} 172 |
||
|{{Copper Coins}} 1,900 in {{ITIM}}24h |
|{{Copper Coins}} 1,900 in {{ITIM}}24h |
||
|- |
|- |
||
|[[File:Hut (Vikings).png|120px|Hut]]<br />'''Hut''' |
|[[File:Hut (Vikings).png|120px|Hut]]<br />'''Hut''' |
||
| − | |{{ICOI}}<ref name="Age" /><br />{{ISUP}}<ref name="Age" /><br />{{XX}} |
+ | | {{ICOI}}<ref name="Age" /><br />{{ISUP}}<ref name="Age" /><br />{{XX}} |
| − | |{{ISIZ}} 3x3<br />{{IROA}} Yes<br />{{ITIM}}1h |
+ | | {{ISIZ}} 3x3<br />{{IROA}} Yes<br />{{ITIM}}1h |
|{{VPOP}} 59 |
|{{VPOP}} 59 |
||
|{{Copper Coins}} 375 in {{ITIM}}8h |
|{{Copper Coins}} 375 in {{ITIM}}8h |
||
|- |
|- |
||
|[[File:Shack.png|120px|Shack]]<br />'''Shack''' |
|[[File:Shack.png|120px|Shack]]<br />'''Shack''' |
||
| − | |{{ICOI}}<ref name="Age" /><br />{{ISUP}}<ref name="Age" /><br />{{XX}} |
+ | | {{ICOI}}<ref name="Age" /><br />{{ISUP}}<ref name="Age" /><br />{{XX}} |
| − | |{{ISIZ}} 2x2<br />{{IROA}} Yes<br />{{ITIM}}1m |
+ | | {{ISIZ}} 2x2<br />{{IROA}} Yes<br />{{ITIM}}1m |
|{{VPOP}} 16 |
|{{VPOP}} 16 |
||
|{{Copper Coins}} 93 in {{ITIM}}4h |
|{{Copper Coins}} 93 in {{ITIM}}4h |
||
|} |
|} |
||
| + | Fact: ''the shack has three types of skins, they have either orange, purple or red canopies'' |
||
=== Cultural Goods Buildings === |
=== Cultural Goods Buildings === |
||
| Line 74: | Line 78: | ||
==== Production Bonus ==== |
==== Production Bonus ==== |
||
| − | Cultural goods buildings provide a production bonus: with each production the player has a '''chance of 3% to get 4x the amount of goods produced'''. With each finished settlement [[Cultural settlements#Production Bonus|this percentage |
+ | Cultural goods buildings provide a production bonus: with each production the player has a '''chance of 3% to get 4x the amount of goods produced'''. With each finished settlement, [[Cultural settlements#Production Bonus|this percentage increases]] by 1.5%, until 15 settlements are finished, after which it stays at 25%. |
| + | |||
| − | {| class="article-table" style="text-align:center" |
||
| + | {| class="FoETable ProdTable" |
||
| − | ! style="width:200px"|Building |
||
| − | ! |
+ | ! style="width:150px" |Building |
| + | ! colspan="2" style="" |Construction |
||
| ⚫ | |||
| − | ! style="width:150px; |
+ | ! style="width:150px; " |{{CuGB}} Production |
| ⚫ | |||
|- |
|- |
||
|[[File:Axe Smith.png|120px|Axe Smith]]<br />'''Axe Smith''' |
|[[File:Axe Smith.png|120px|Axe Smith]]<br />'''Axe Smith''' |
||
| − | |{{VPOP}} <font style="color:red"> -45</font><br />{{ICOI}}<ref name="Age" /><br />{{ISUP}}<ref name="Age" /> |
+ | | style="width:75px;" |{{VPOP}} <font style="color:red"> -45</font><br />{{ICOI}}<ref name="Age" /><br />{{ISUP}}<ref name="Age" /> |
| − | |{{ISIZ}} 3x3<br />{{IROA}} Yes<br />{{ITIM}}1h |
+ | | style="width:75px;" |{{ISIZ}} 3x3<br />{{IROA}} Yes<br />{{ITIM}}1h |
|{{Axes}} 5 in {{ITIM}}4h<br />{{Axes}} 10 in {{ITIM}}8h<br />{{Axes}} 20 in {{ITIM}}24h |
|{{Axes}} 5 in {{ITIM}}4h<br />{{Axes}} 10 in {{ITIM}}8h<br />{{Axes}} 20 in {{ITIM}}24h |
||
| ⚫ | |||
| ⚫ | |||
| ⚫ | |||
| ⚫ | |||
| ⚫ | |||
| ⚫ | |||
|{{Copper Coins}} 1,000<br />{{Copper Coins}} 2,000<br />{{Copper Coins}} 4,000 |
|{{Copper Coins}} 1,000<br />{{Copper Coins}} 2,000<br />{{Copper Coins}} 4,000 |
||
|- |
|- |
||
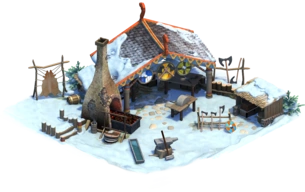
|[[File:Mead Brewery.png|120px|Mead Brewery]]<br />'''Mead Brewery''' |
|[[File:Mead Brewery.png|120px|Mead Brewery]]<br />'''Mead Brewery''' |
||
| − | |{{VPOP}} <font style="color:red"> -36</font><br />{{ICOI}}<ref name="Age" /><br />{{ISUP}}<ref name="Age" /> |
+ | | {{VPOP}} <font style="color:red"> -36</font><br />{{ICOI}}<ref name="Age" /><br />{{ISUP}}<ref name="Age" /> |
| − | |{{ISIZ}} 3x4<br />{{IROA}} Yes<br />{{ITIM}}1h |
+ | | {{ISIZ}} 3x4<br />{{IROA}} Yes<br />{{ITIM}}1h |
|{{Mead}} 5 in {{ITIM}}4h<br />{{Mead}} 10 in {{ITIM}}8h<br />{{Mead}} 20 in {{ITIM}}24h |
|{{Mead}} 5 in {{ITIM}}4h<br />{{Mead}} 10 in {{ITIM}}8h<br />{{Mead}} 20 in {{ITIM}}24h |
||
| ⚫ | |||
| ⚫ | |||
| ⚫ | |||
| ⚫ | |||
| ⚫ | |||
| ⚫ | |||
|{{Copper Coins}} 1,000<br />{{Copper Coins}} 2,000<br />{{Copper Coins}} 4,000 |
|{{Copper Coins}} 1,000<br />{{Copper Coins}} 2,000<br />{{Copper Coins}} 4,000 |
||
|- |
|- |
||
|[[File:Wool Farm.png|120px|Wool Farm]]<br />'''Wool Farm''' |
|[[File:Wool Farm.png|120px|Wool Farm]]<br />'''Wool Farm''' |
||
| − | |{{VPOP}} <font style="color:red"> -27</font><br />{{ICOI}}<ref name="Age" /><br />{{ISUP}}<ref name="Age" /> |
+ | | {{VPOP}} <font style="color:red"> -27</font><br />{{ICOI}}<ref name="Age" /><br />{{ISUP}}<ref name="Age" /> |
| − | |{{ISIZ}} 5x3<br />{{IROA}} Yes<br />{{ITIM}}1h |
+ | | {{ISIZ}} 5x3<br />{{IROA}} Yes<br />{{ITIM}}1h |
|{{Wool}} 5 in {{ITIM}}4h<br />{{Wool}} 10 in {{ITIM}}8h<br />{{Wool}} 20 in {{ITIM}}24h |
|{{Wool}} 5 in {{ITIM}}4h<br />{{Wool}} 10 in {{ITIM}}8h<br />{{Wool}} 20 in {{ITIM}}24h |
||
|{{Copper Coins}} 1,000<br />{{Copper Coins}} 2,000<br />{{Copper Coins}} 4,000 |
|{{Copper Coins}} 1,000<br />{{Copper Coins}} 2,000<br />{{Copper Coins}} 4,000 |
||
| Line 111: | Line 116: | ||
'''Beware''': when finishing or abandoning a settlement, all diplomacy gained will be lost. |
'''Beware''': when finishing or abandoning a settlement, all diplomacy gained will be lost. |
||
| − | The buildings that produce copper coins have 6 different production options, in the following table |
+ | The buildings that produce copper coins have 6 different production options, in the following table all productions are listed. |
| − | {| class=" |
+ | {| class="FoETable ProdTable ColumnLeft5" |
| − | ! style="width:150px"|Building |
+ | ! style="width:150px" |Building |
| − | ! colspan="2" style=" |
+ | ! colspan="2" style="" |Construction |
| − | ! style="width:150px; |
+ | ! style="width:150px; " |{{Diplomacy}} Diplomacy |
| − | ! style="width:150px; |
+ | ! style="width:150px; " |{{Copper Coins}} Production |
|- |
|- |
||
|[[File:Runestone.png|80px|Runestone]]<br />'''Runestone''' |
|[[File:Runestone.png|80px|Runestone]]<br />'''Runestone''' |
||
| − | |style="width: |
+ | | style="width:75px;" |{{ICOI}}<ref name="Age" /><br />{{ISUP}}<ref name="Age" /><br />{{XX}} |
| − | |{{ISIZ}} 1x1<br />{{IROA}} No<br />{{ITIM}}1m |
+ | | style="width:75px;" |{{ISIZ}} 1x1<br />{{IROA}} No<br />{{ITIM}}1m |
|{{Diplomacy}} 6 |
|{{Diplomacy}} 6 |
||
| |
| |
||
|- |
|- |
||
|[[File:Shrine.png|120px|Shrine]]<br />'''Shrine''' |
|[[File:Shrine.png|120px|Shrine]]<br />'''Shrine''' |
||
| − | | |
+ | | {{VPOP}} <font style="color:red">-17</font><br />{{ICOI}}<ref name="Age" /><br />{{ISUP}}<ref name="Age" /> |
| − | |{{ISIZ}} 2x2<br />{{IROA}} Yes<br />{{ITIM}}1m |
+ | | {{ISIZ}} 2x2<br />{{IROA}} Yes<br />{{ITIM}}1m |
|{{Diplomacy}} 24 |
|{{Diplomacy}} 24 |
||
| − | |{{ |
+ | |{{DProd|{{copper Coins}}|16|38|113|300|449|898}} |
|- |
|- |
||
|[[File:Clan Totem.png|100px|Clan Totem]]<br />'''Clan Totem''' |
|[[File:Clan Totem.png|100px|Clan Totem]]<br />'''Clan Totem''' |
||
| − | | |
+ | | {{ICOI}}<ref name="Age" /><br />{{ISUP}}<ref name="Age" /><br />{{XX}} |
| − | |{{ISIZ}} 1x2<br />{{IROA}} No<br />{{ITIM}}1h |
+ | | {{ISIZ}} 1x2<br />{{IROA}} No<br />{{ITIM}}1h |
|{{Diplomacy}} 24 |
|{{Diplomacy}} 24 |
||
| |
| |
||
|- |
|- |
||
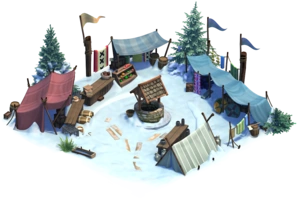
|[[File:Market.png|120px|Market]]<br />'''Market''' |
|[[File:Market.png|120px|Market]]<br />'''Market''' |
||
| − | | |
+ | | {{VPOP}} <font style="color:red">-38</font><br />{{ICOI}}<ref name="Age" /><br />{{ISUP}}<ref name="Age" /> |
| − | |{{ISIZ}} 3x3<br />{{IROA}} Yes<br />{{ITIM}}1h |
+ | | {{ISIZ}} 3x3<br />{{IROA}} Yes<br />{{ITIM}}1h |
|{{Diplomacy}} 108 |
|{{Diplomacy}} 108 |
||
| − | |{{ |
+ | |{{DProd|{{copper Coins}}|41|98|294|784|1.175|2.350}} |
|- |
|- |
||
|[[File:Old Willow.png|120px|Old Willow]]<br />'''Old Willow''' |
|[[File:Old Willow.png|120px|Old Willow]]<br />'''Old Willow''' |
||
| − | | |
+ | | {{ICOI}}<ref name="Age" /><br />{{ISUP}}<ref name="Age" /><br />{{XX}} |
| − | |{{ISIZ}} 3x2<br />{{IROA}} No<br />{{ITIM}} |
+ | | {{ISIZ}} 3x2<br />{{IROA}} No<br />{{ITIM}}4h |
|{{Diplomacy}} 108 |
|{{Diplomacy}} 108 |
||
| |
| |
||
|- |
|- |
||
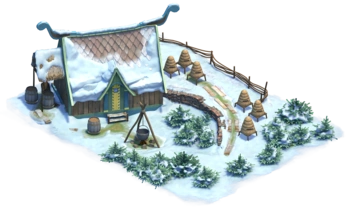
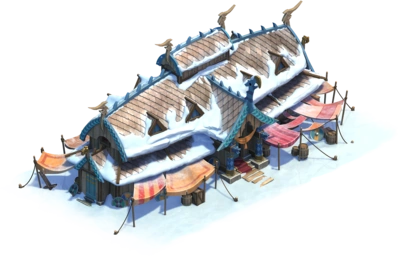
|[[File:Mead Hall.png|120px|Mead Hall]]<br />'''Mead Hall''' |
|[[File:Mead Hall.png|120px|Mead Hall]]<br />'''Mead Hall''' |
||
| − | | |
+ | | {{VPOP}} <font style="color:red">-63</font><br />{{ICOI}}<ref name="Age" /><br />{{ISUP}}<ref name="Age" /> |
| − | |{{ISIZ}} 5x3<br />{{IROA}}Yes<br />{{ITIM}} |
+ | | {{ISIZ}} 5x3<br />{{IROA}}Yes<br />{{ITIM}}4h |
|{{Diplomacy}} 270 |
|{{Diplomacy}} 270 |
||
| − | |{{ |
+ | |{{DProd|{{copper Coins}}|91|217|649|1.729|2.593|5.186}} |
|} |
|} |
||
=== Roads === |
=== Roads === |
||
All settlement buildings except some diplomacy buildings require a road connection to the embassy. |
All settlement buildings except some diplomacy buildings require a road connection to the embassy. |
||
| − | {| class="article-table" style=" |
+ | {| class="article-table" style="" |
| − | ! style="width:200px"|Road |
+ | ! style="width:200px" |Road |
| − | ! colspan="2" style="width:150px; |
+ | ! colspan="2" style="width:150px; " |Construction |
|- |
|- |
||
|[[File:Snow Trail.png|120px|Snow Trail]]<br />'''Snow Trail''' |
|[[File:Snow Trail.png|120px|Snow Trail]]<br />'''Snow Trail''' |
||
| Line 173: | Line 178: | ||
'''Warning''': before using [[diamonds]], be aware that when finishing a settlement (or abandoning one), the settlement will be reset and '''all buildings, goods in stock, advancements and expansions''' will be lost, including those unlocked with diamonds. |
'''Warning''': before using [[diamonds]], be aware that when finishing a settlement (or abandoning one), the settlement will be reset and '''all buildings, goods in stock, advancements and expansions''' will be lost, including those unlocked with diamonds. |
||
| − | {| class=" |
+ | {| class="FoETable" |
| − | ! style="width:100px"|Expansion |
+ | ! style="width:100px" |Expansion |
| − | ! style="width:100px; |
+ | ! style="width:100px; " |{{Axes}} Axes |
| − | ! style="width:100px; |
+ | ! style="width:100px; " |{{Mead}} Mead |
| − | ! style="width:100px; |
+ | ! style="width:100px; " |{{Horns}} Horns |
| − | ! style="width:100px; |
+ | ! style="width:100px; " |{{Wool}} Wool |
|- |
|- |
||
|<big>1</big> |
|<big>1</big> |
||
Latest revision as of 09:13, 3 July 2023
The Viking Settlement is the first of the Cultural settlements, released on January 3rd 2019. The purpose is to lead the Vikings to prosperity as the Thane of their new village.
This page explains the workings of the settlement and its buildings. For information about the quests, embassy advancements, and rewards check the Vikings page.
Start[]
When starting the Viking Settlement the player will have a city grid the size of 4 expansions (2x2), with the Viking embassy in the top corner, and a stock of ![]() 5,000 copper coins. Take notice of the impediments on the city grid, unmovable rocks that block part of the grid. These cannot be removed, so it's necessary to build around the impediments, making it harder to arrange buildings.
5,000 copper coins. Take notice of the impediments on the city grid, unmovable rocks that block part of the grid. These cannot be removed, so it's necessary to build around the impediments, making it harder to arrange buildings.
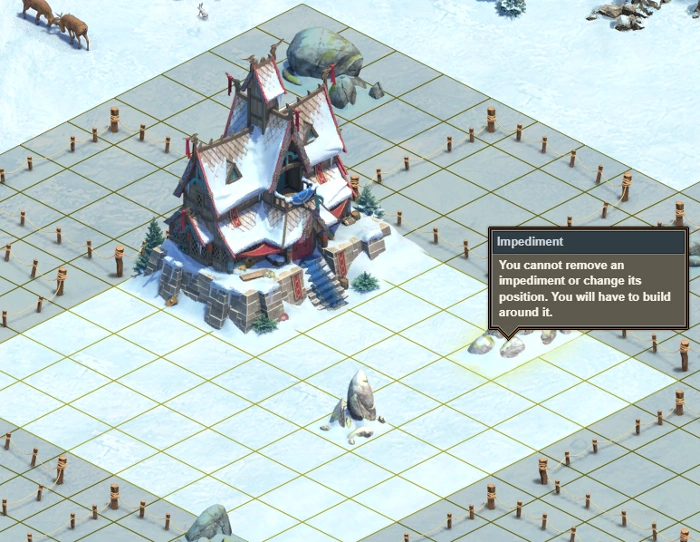
With each start of a new Cultural settlement, the impediments will be arranged differently in the city. Abandoning a settlement will not rearrange the impediments.
Additional expansions can be unlocked by either paying cultural goods or diamonds. The player can unlock a total of 16 expansions by paying cultural goods and 4 with diamonds. The total city grid can fit 25 expansions, including the first 4. You should only need 8 or 9 expansions to complete all quests, which you can get by paying cultural goods; you do not need to spend diamonds.
Embassy[]
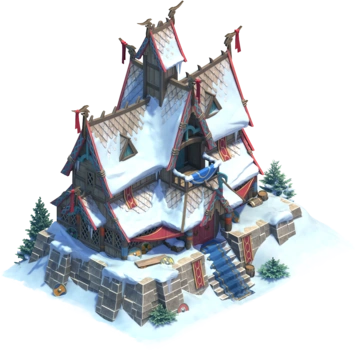
The Viking embassy has a size of ![]() 4x3 and can be moved to another location on the grid. The embassy cannot be sold.
4x3 and can be moved to another location on the grid. The embassy cannot be sold.
The Embassy produces ![]() 100 Copper coins per day.
100 Copper coins per day.
Click on the embassy (or on the 'Develop' button, hotkey 'R') to open the Embassy Advancements window. This window shows the player's cultural goods stock at the top left. The main screen shows the embassy advancements and the costs to unlock them: the amount of cultural goods shown in the middle and on the bottom the amount of diplomacy needed. The amount of diamonds displayed to unlock an advancement depends on the amount of goods and/or diplomacy still needed. The player can choose to gain the amount of resources and diplomacy still needed, or pay the difference with diamonds.
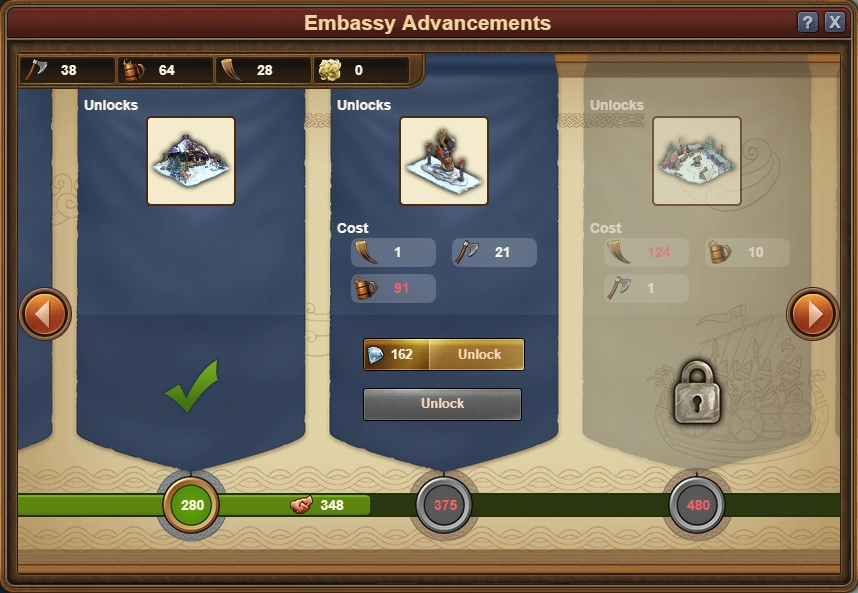
A list of all embassy advancements and their requirements can be found on the Vikings page.
Buildings[]
Building Menu[]
The building menu consists of four types of buildings and an expansions window:
 Residential buildings
- Cultural Goods buildings
- Diplomacy buildings
- Roads
- Expansions
At the start of the settlement, the player will have one of each type of building available in the building menu: the Shack, Axe Smith, Runestone and Snow Trail. All other buildings become available by unlocking embassy advancements.
The building cost of each settlement building depends on the player's era and consists of resources from the main city: coins and supplies.
All resources gained from the settlement, stay in the settlement. Players cannot trade cultural goods with other players.
Residential Buildings[]
Residential buildings provide Viking population and copper coins. Copper coins are needed for the production of cultural goods.
Beware: when finishing or abandoning a settlement, all population and copper coins in stock will be lost.
| Building | Construction | |||
|---|---|---|---|---|
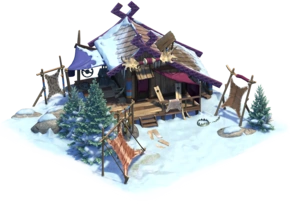
 Clan House |
||||
 Hut |
||||
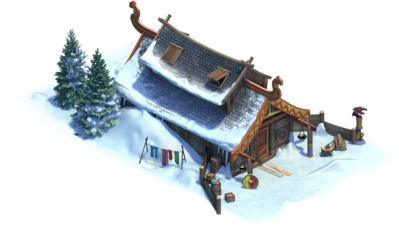
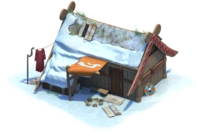 Shack |
||||
Fact: the shack has three types of skins, they have either orange, purple or red canopies
Cultural Goods Buildings[]
Cultural goods buildings provide an amount of cultural goods, from 5 to 20, depending on the chosen production time. The production is similar to goods production in the main city, but requires a resource that the player gathers in the settlement: copper coins.
Cultural goods are used for unlocking embassy advancements and expansions.
Unlike main city goods, the player cannot trade cultural goods with other players.
Beware: when finishing or abandoning a settlement, all cultural goods in stock will be lost.
Production Bonus[]
Cultural goods buildings provide a production bonus: with each production the player has a chance of 3% to get 4x the amount of goods produced. With each finished settlement, this percentage increases by 1.5%, until 15 settlements are finished, after which it stays at 25%.
| Building | Construction | |||
|---|---|---|---|---|
 Axe Smith |
||||
 Mead Brewery |
||||
 Beast Hunter |
||||
 Wool Farm |
||||
Diplomacy Buildings[]
Diplomacy buildings provide diplomacy, some of them also produce copper coins. Diplomacy is needed to unlock embassy advancements. Although diplomacy seems similar to happiness, it has no effect on the Viking population or on settlement productions.
Beware: when finishing or abandoning a settlement, all diplomacy gained will be lost.
The buildings that produce copper coins have 6 different production options, in the following table all productions are listed.
| Building | Construction |
|
||
|---|---|---|---|---|
 Runestone |
|
|||
 Shrine |
|
| ||
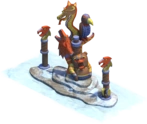 Clan Totem |
|
|||
 Market |
|
| ||
 Old Willow |
|
|||
 Mead Hall |
|
| ||
Roads[]
All settlement buildings except some diplomacy buildings require a road connection to the embassy.
| Road | Construction | |
|---|---|---|
 Snow Trail |
||
Expansions[]
To expand the settlement, the player can buy 16 expansions with cultural goods. The cost of an expansion is one of the four options shown below. Example: to place the 6th expansion the player can choose between paying ![]() 41 Axes, or
41 Axes, or ![]() 21 Mead, or
21 Mead, or ![]() 5 Horns, or
5 Horns, or ![]() 1 Wool.
1 Wool.
There are also 4 expansions that can be unlocked with diamonds. These cost ![]() 500 each.
500 each.
Warning: before using diamonds, be aware that when finishing a settlement (or abandoning one), the settlement will be reset and all buildings, goods in stock, advancements and expansions will be lost, including those unlocked with diamonds.
| Expansion | ||||
|---|---|---|---|---|
| 1 | 1 | 1 | 1 | 1 |
| 2 | 5 | 1 | 1 | 1 |
| 3 | 12 | 1 | 1 | 1 |
| 4 | 21 | 5 | 1 | 1 |
| 5 | 32 | 12 | 1 | 1 |
| 6 | 41 | 21 | 5 | 1 |
| 7 | 48 | 32 | 12 | 1 |
| 8 | 55 | 41 | 21 | 5 |
| 9 | 62 | 48 | 32 | 12 |
| 10 | 69 | 55 | 41 | 21 |
| 11 | 76 | 62 | 48 | 32 |
| 12 | 82 | 69 | 55 | 41 |
| 13 | 89 | 76 | 62 | 48 |
| 14 | 96 | 82 | 69 | 55 |
| 15 | 103 | 89 | 76 | 62 |
| 16 | 110 | 96 | 82 | 69 |